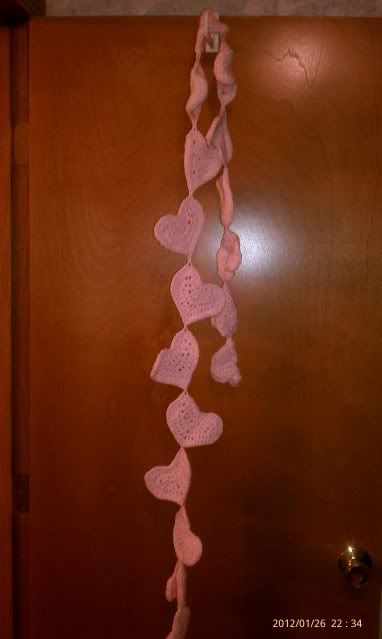
 I have decided to start publishing some of the patterns I have created over the years. Because Valentines day is soon to arrive I decided I would start with this quick scarf pattern. I designed, wrote, and completed this in a few hours so it should crochet up quickly. Once you have the first heart or 2 down this is the type of pattern I call a "curl up in your chair in front of the TV with a hook and yarn" type of pattern.
Be My Valentine Scarf
I used 2 skeins of Red Heart worsted weight yarn, Not sure what the exact color was, it is a light pink, I have had this yarn in my massive yarn stash for a while and the tag was no longer with the skeins of yarn.
This scarf was crocheted using double strand of yarn (holding 2 stands of yarn together and crocheting as if they were one). I found the hearts held their shape better with the heavier weight of 2 strands, but still works up nicely using lighter or heavier yarn, you would just need to adjust the hook size according to the yarn weight.
I used a crochet hook K
(please keep in mine this is the first time I have wrote out a pattern for others to use, if you find any errors please let me know)
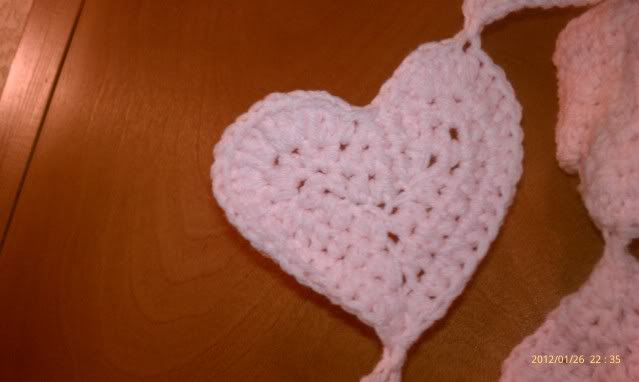
Round one is the hardest round because you must crochet across the top then bottom of the foundation chain, once you get that the rest of the pattern is a breeze. And don't get worried at first, it doesn't really start looking like a heart until the 3rd round. The scarf is crochet in a series of separate hearts that will joined on the last round.
Start with ch 6
Round 1: hdc in second ch from hook, hdc in next st, hdc next 2 sts tog, hdc in next st, 4 hdc in next st (this should put you at the end of the ch, do not turn your work, you will now continue to work across the bottom of the ch) 1 hdc in next st (remember this will be on the bottom of the foundation ch), 2 hdc in next st, ch 1, 2 hdc in next st, 1 hdc in next st, 3hdc in last st, join with a slip st with first hdc.
Round 2: ch 1, 1 hdc in same st as join, hdc in next st, hdc next 2 sts tog, hdc in next st, 2 hdc in next st, 3 hdc in next st, 3 hdc in next st, 1 hdc in next 2 sts, 2hdc in next st, ch1, 2hdc in next st, 1 hdc in next 2 sts, 3 hdc in next st, 3 hdc in next st, join with a slip st.
Round 3 of first heart only: ch 2, 1 dc in join st, sc in next st, sc next 2 sts tog, sc in next st, 2 dc in next st, 3 dc in next st, 3 dc in next st, 2 dc in next st, 2 hdc in next st, 2 hdc in next st, 1 hdc in next 4 sts, 2 dc in next st, ch 1, 2 dc in next st, 1 hdc in next 4 sts, 2 hdc in next st, 2 hdc in next st, 2 dc in next st, 3 dc in next st, 3 dc in next st, join, cut yarn and weave in ends (will show you how to do a professional final st in a later post).
Round 3 of all the rest of the hearts: ch 2, 1 dc in join st, sc in next st, sc next 2 sts tog, sc in next st, 2 dc in next st, 3 dc in next st, 3 dc in next st, 2 dc in next st, 2 hdc in next st, 2 hdc in next st, 1 hdc in next 4 sts, 2 dc in next st, join your heart to the previous one with a sc, 2 dc, 1 hdc in next 4 sts, 2 hdc in next st, 2 hdc in next st, 2 dc in next st, 3 dc in next st, 3 dc in next st, join, cut yarn and weave in ends (will show you how to do a professional final st in a later post).
*to join hearts with a sc, you simply insert your hook through a stitch where you want the heart to join, pull up a st, then finish the sc. you can join the hearts in any pattern you like, the one pictured I simply alternated the join on on the top 2 sides of the heart. This is where you can be creative and add your own touch, you can attach each one in the same place or rotate them around a little.
I continued to make hearts until I ran out of yarn, my finished scarf was about 6 feet long. This is the length that my teenage daughters love.
NOTE: Upon typing and re-reading this pattern I feel like I may have missed 2 sts on the first round, If you are having problems try this, after the 4 hdc in round one: 1 hdc in next 2 sts (remember this will be on the bottom of the foundation ch), 2 hdc in next st, ch 1, 2 hdc in next st, 1 hdc in next 2 sts... then continue on.
EDIT: I found the problem, I just knew something didn't sound right when I was typing it up. The problem should be corrected now (in red). Thank you for your patience.
EDIT: I found the problem, I just knew something didn't sound right when I was typing it up. The problem should be corrected now (in red). Thank you for your patience.
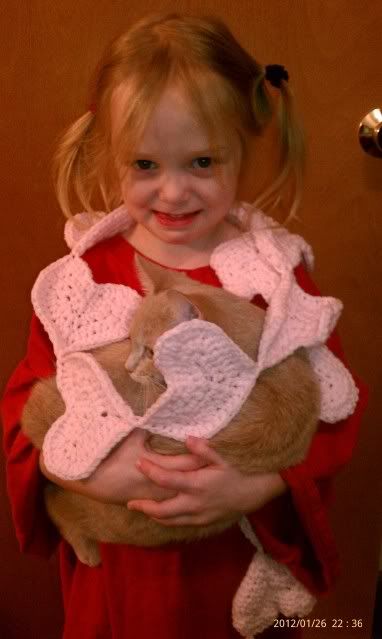
Dani and her kitty Peaches modeling the scarf.
(This pattern may be used to make items for personal use only, you can not sell items made from this pattern or the pattern itself. If you have made items and would like to share, please link back to me, Thank You!)


No comments:
Post a Comment